MeshCore Firmware
Firmware variants, flashing procedures, and update management for MeshCore nodes.
- MeshCore Firmware Variants Explained
- MeshCore Firmware Distributions
- Flashing MeshCore Firmware
- Keeping MeshCore Firmware Updated
- Flashing MeshCore Firmware OTA: The Definitive Guide
MeshCore Firmware Variants Explained
Accurate as of 13 July 2026. Firmware version numbers below should be checked against the current releases before you rely on them.
MeshCore is built in several distinct firmware types, each designed for a specific role in the mesh. Choosing the right one matters: the roles are not interchangeable, and a node flashed as a Repeater cannot be used as a personal messenger.
This page covers node roles. On this page, "variant" always means role. There is a second, separate choice: which distribution you flash. Stock MeshCore is one option, and several independent projects (EasySkyMesh, Keymind Cascade, MCLite, WADAMESH, ZephCore) build their own MeshCore firmware with different priorities. See MeshCore Firmware Distributions. Pick a distribution first, then a role within it.
The Firmware Variants
Companion
The Companion firmware is for user-facing nodes. It is what you run on your personal device to send and receive messages through the MeshCore mobile app.
- Primary function: Sends and receives direct messages and channel (group) messages. Maintains a contact list. Connects to the MeshCore mobile app.
- Three builds, not two. BLE Companion and USB Serial Companion are both prebuilt by the official flasher. A Wi-Fi Companion build also exists, but the official flasher does not ship it, because the Wi-Fi SSID and password are compiled into the binary. You either build it yourself or take a prebuilt one from a fork (Keymind Cascade prebuilds Wi-Fi companion binaries).
- When to use: Personal handheld nodes, base station nodes used for human communication, any node a person interacts with via the app.
- Firmware file example:
Heltec_v3_companion_radio_ble-v1.16.0-07a3ca9.bin(or the corresponding..._companion_radio_usb-...build; RAK4631 nRF52840 boards ship a.uf2companion build)
Repeater
The Repeater firmware turns a node into dedicated mesh infrastructure. It has no user interface and no messaging capability of its own.
A MeshCore repeater is not a repeat-everything flood relay. This is the single most common misunderstanding, and it is MeshCore's main architectural difference from other LoRa mesh systems. Upstream's FAQ puts it in bold: a MeshCore repeater "does not forward or retransmit every packet it receives, unlike other LoRa mesh systems."
- How it actually works: MeshCore floods a packet only while it is discovering a route. Once a path is known, packets carry that path, and only the repeaters named in the path retransmit them. See MeshCore Routing: Flood-First, Direct-Route-After.
- No Bluetooth. You cannot connect to a node running Repeater firmware over Bluetooth. It is administered over USB serial, or remotely over the air.
- When to use: Any node whose sole purpose is extending mesh coverage. Hilltop repeaters, building relays, infrastructure backbone nodes.
- When NOT to use: Do not flash Repeater on a node you intend to use as a personal communicator. It has no user-facing messaging.
- Firmware file example:
Heltec_v3_repeater-v1.16.0-07a3ca9.bin(RAK4631 nRF52840 boards ship a.uf2repeater build)
Room Server
The Room Server firmware creates a store-and-forward message room. It works like a small BBS or persistent group chat reachable over LoRa.
- Primary function: Clients log in to the room and post messages. The server stores the room's posts and pushes recent unseen ones to a client when it next connects, so you can catch up on what you missed while offline.
- Scope, precisely: it stores that room's posts, and it pushes a limited backlog (upstream currently pushes the last 32 unseen posts on login). It is not a network-wide message archive and it does not store other people's direct messages.
- When to use: Fixed infrastructure serving as a community message hub, in a building, on a hilltop, or at an event site where a persistent group thread is useful.
- Firmware file example:
Heltec_v3_room_server-v1.16.0-07a3ca9.bin(RAK4631 nRF52840 boards ship a.uf2room_server build)
GUI
For boards with a screen, the official flasher builds GUI firmware (and a GUI-with-SD-card variant). A GUI node is a Companion with an on-device interface, not a separate network role: it messages and it does not relay.
KISS Radio
A KISS TNC build. It turns the node into a plain modem driven by a host computer, rather than a participant in the mesh in its own right. See MeshCore KISS Modem Protocol.
Sensor: read this carefully
Sensor firmware is the most misunderstood item in this list, so be precise about what exists.
- The upstream MeshCore repository contains a
simple_sensorexample application. The source exists. - The official flasher does not build it. The flasher's role list is Companion (BLE), Companion (USB), Repeater, Room Server, GUI, GUI-with-SD, and KISS. There is no Sensor entry, and the upstream releases contain no sensor binaries. You cannot flash a stock Sensor build from flasher.meshcore.io.
- To get a prebuilt Sensor binary you either compile it yourself or take one from a fork. Keymind Cascade ships Sensor builds for roughly 17 boards, and they are flashable from the Mesh America Device Configurator.
- Sensor readings are not broadcast in adverts. A MeshCore advert announces a node's presence, not its telemetry. Sensor data moves over MeshCore's request/response protocol. See MeshCore Sensor Nodes.
Summary Table
| Role | Messages | Relays for others | Stores messages | Prebuilt by official flasher |
|---|---|---|---|---|
| Companion (BLE / USB) | Yes | No | Its own only | Yes |
| Companion (Wi-Fi) | Yes | No | Its own only | No Self-compiled, or from a fork |
| Repeater | No | Yes, along known paths. Not everything | No | Yes |
| Room Server | No | No | Yes, that room's posts | Yes |
| GUI | Yes, on device | No | Its own only | Yes, on screen-equipped boards |
| KISS Radio | No, host-driven | No | No | Yes |
| Sensor | No | No | No | No Source is upstream; binaries from forks or your own build |
Sources: the official MeshCore flasher catalog (flasher.meshcore.io), the MeshCore FAQ, and the firmware repository at github.com/meshcore-dev/MeshCore.
MeshCore Firmware Distributions
Accurate as of 13 July 2026. Firmware moves fast. Check versions and device counts against the configurator before relying on them.
Two different choices get confused with each other.
Which distribution? That is this page. Stock MeshCore, or one of five community builds that each do something different: save power, add a touchscreen, make messages more likely to arrive.
Which role? Companion, Repeater, Room Server. That is MeshCore Firmware Variants Explained. Pick a distribution first, then a role inside it.
These six are the ones you can flash from the Mesh America Device Configurator. There are more distributions being added all the time.
You can always change your mind
Flashing is reversible. You are not going to brick your radio, and you can always go back to stock.
What you can lose is your node identity and contact list. A clean install usually gives the node a new identity, so your contacts will see you as a new person and have to add you again. Write down your radio settings (frequency, bandwidth, spreading factor, coding rate) before you start.
See Flashing MeshCore Firmware, or Flashing OTA for a node you cannot reach.
Do they all work together?
All of the distributions listed on this page attempt to adhere to the official MeshCore protocol.
The six at a glance
Distribution | What it is | Pick it when |
|---|---|---|
MeshCore Official | The standard firmware. | Almost always. This is the right answer for most nodes. |
EasySkyMesh PowerSaving | Tuned to use less power. | Solar or battery repeaters, where battery life is your limit. |
Keymind Cascade | Improves deliverability and network performance Experimental. | Your Direct Messages keep failing to send. |
MCLite | Turns a T-Deck or T-Watch into a standalone messenger. Early days. | You want to use the radio on its own, without a phone. |
WADAMESH | A touchscreen interface with a map. | You have a touchscreen device and want chat and a map on it. |
ZephCore | A rebuild of MeshCore on the Zephyr operating system. | Battery life matters, or your board only works with ZephCore. |
MeshCore Official
The standard firmware, from the MeshCore team. MIT licensed. This is what flasher.meshcore.io gives you. Everything else on this page is built on top of it.
Start here. It is what the phone apps are built against and what everyone assumes you are running. 59 devices, 12 manufacturers.
Two things it does not give you. There is no Sensor build and no Wi-Fi Companion build in the official flasher. The code for both exists upstream, but you have to compile it yourself or get a ready-made copy from a fork. Keymind Cascade prebuilds both.
EasySkyMesh PowerSaving
A version of MeshCore tuned to draw less power, from IoTThinks. Same features, longer battery life. Roles: Companion (BLE), Repeater, Room Server. 42 devices.
About the "15 mA" headline. Its own test table is more varied than the headline suggests: Heltec v3 at 19.6 mA, Heltec v4.3 at 24.9 mA, Xiao S3 at 16.3 mA. Only the Xiao C3 actually hits 15 mA. Real savings, but plan your solar around the number for your board, not the headline. These are the project's own measurements and nobody else has checked them.
More: EasySkyMesh.
Keymind Cascade
The problem
Each repeater passes your message on exactly once, then forgets about it. If the next repeater misses it, the message is gone and nothing retries. One user measured roughly 45% of direct messages failing once the path was two or more hops. Sometimes it did arrive and only the receipt got lost on the way back, so your app says "failed" while the other person is reading it.
The fix
Cascade makes each repeater listen to check the message got picked up, the way you would watch to make sure the next person in a line actually takes what you handed them. If it hears the next repeater pass the message on, it knows it worked. If it hears nothing, it sends it again.
When the mesh is healthy, this costs nothing. Nothing extra goes out unless something was genuinely lost. It does the same for delivery receipts, and it can send replies by two routes at once, which fixes one-way paths where your message arrives but the reply never finds its way home.
Try this first, no fork needed
Some of Cascade is just MeshCore settings tuned for deliverability and performance. You can set them on official firmware from the repeater command line, without actually re-flashing to Keymind Cascade.
set multi.acks 1          send delivery receipts more than once
set rxdelay 2             let the strongest repeater go first
set loop.detect minimal   drop messages stuck going in circles
set agc.reset.interval 8  stop the radio going deaf over time
Only the listen-and-retry behaviour actually requires Cascade.
The catch
Retries cost airtime, and airtime is shared. Your retries are everyone else's interference. Cascade ships three profiles:
Profile | Retries | Use it when |
|---|---|---|
| Few | Busy area, lots of nodes. Other routes exist, so do not shout. |
(default) | Many | A fixed node with a weak-ish link into a mesh that mostly works. |
| Most | Out at the edge with no other way through, where getting the message out beats being polite. |
The busier your area, the fewer retries you should use. A rooftop repeater in a well-covered city wants infra, not rooftop, whatever the name suggests. Putting mobile on a busy repeater makes things worse for everyone around you.
MCLite
Turns a LilyGo T-Deck Plus or T-Watch Ultra into a messenger that works entirely on its own. No phone, no pairing, no account. Turn it on and text people. MIT licensed, still pre-1.0, and its author calls it experimental.
- Setup is a file on an SD card. You build a
config.jsonwith an offline tool and drop it on the card. One person can set up a whole group and hand out cards. - Extras stock does not have: an SOS broadcast, low-battery alerts to your contacts, offline maps, quick replies, a night-vision theme.
- It does not auto-add contacts. Nodes it overhears go in a "Heard Adverts" list and you choose who to keep. An empty contact list on a new device is normal, not a fault.
The one real catch: messages you type on the device do not show up in the phone app. They send fine over the mesh, they just never appear in the app's history. This is a limit of MeshCore itself and MCLite cannot fix it. If you want a complete history in the app, type in the app.
WADAMESH
A full touchscreen interface: chat, contacts, and a real pannable map with offline tiles, all on the device. Works with the phone app at the same time. GPL licensed, from ALLFATHER BV in Belgium.
- Hardware: Heltec V4 with the touch kit, or a LilyGo T-Deck. (Its own flasher supports a few more boards on a beta channel.)
- Everything is beta. There is no 1.0 release yet.
- Prefer the T-Deck. The Heltec V4 has less memory and no SD card slot, so several features are cut back on it.
ZephCore
MeshCore rebuilt on different underlying software (the Zephyr operating system), which lets the radio sleep properly between messages instead of idling. MIT licensed. Aims to be fully compatible with normal MeshCore and the phone apps.
- Big battery savings, but you have to switch them on. Its power-saving receive mode cuts idle current from roughly 10 to 15 mA down to 3 to 5 mA, but it is off by default. Turn it on with
set rxduty on. If you picked ZephCore for battery life, this is the switch you came for and it is not flipped for you. Requires 1.16 repeaters. - Smarter timing. It measures how crowded the airwaves are locally and waits accordingly, instead of using one fixed delay everywhere.
- 31 devices in the configurator, including some boards nothing else supports.
- Worth knowing: the author states openly that the project is almost entirely AI-written. That is his own disclosure, not our judgement. Treat it like any firmware: test before you deploy.
How to choose
- Just use MeshCore Official. If nothing below applies, flash the official build and stop reading.
- Messages keep failing? First try the four stock settings in the Keymind section. They are free. If it is still bad, flash Keymind Cascade and pick the profile that matches how busy your area really is.
- Solar or battery repeater? EasySkyMesh PowerSaving or ZephCore. With ZephCore, remember to turn on
rxduty. - T-Deck, T-Watch or a touchscreen? MCLite to use it without a phone. WADAMESH if you want the map.
- Board not in the official flasher? Try the Keymind Cascade or ZephCore catalogs.
One last thing. None of this matters if your radio settings are wrong, your radios are not in an ideal location (height is might) or your antenna is not tuned. Your node has to be on the same frequency, bandwidth, spreading factor and coding rate as everyone else in your area. That is the most common reason a new node hears nothing at all. Get those four numbers from your local mesh group before you go blaming the firmware.
A word of caution
Four of these are small community projects and several are openly experimental. That is not a reason to avoid them, but it is a reason to keep a stock build handy, know how to reflash a node you cannot reach, and think twice before putting experimental firmware on a repeater at the top of a tower.
Sources: the Mesh America Device Configurator catalogs; the official MeshCore flasher catalog; and the repositories, release notes, issues and pull requests of each project.
Flashing MeshCore Firmware
MeshCore firmware can be installed on supported hardware using two primary methods: the MeshCore Web Flasher (browser-based) and UF2 drag-and-drop (for nRF52840 boards only).
Method 1: MeshCore Web Flasher
The MeshCore Web Flasher is the recommended method for most users. It runs entirely in a browser and uses the WebSerial API to communicate with the board over USB.
URL: https://flasher.meshcore.io (the canonical flasher, run by the MeshCore core team. flasher.meshcore.co.uk is a separate downstream flasher for the MeshOS variant - use the .io address for standard MeshCore.)
Browser Requirements
The WebSerial API is only available in Chromium-based browsers (the WebSerial API shipped in Chrome/Edge 89 - see MDN/Can I Use):
- Google Chrome (version 89 or later) - recommended
- Microsoft Edge (version 89 or later) - supported
- Firefox, Safari - NOT supported. WebSerial is not implemented in these browsers.
Step-by-Step: Initial Flash
- Open flasher.meshcore.io in Chrome or Edge.
- Connect your board to your computer via USB.
- Select your board type from the dropdown (e.g., RAK4631, T114, Heltec V3).
- Select the firmware variant you want to flash:
- Companion - for personal use nodes (connects to MeshCore app)
- Repeater - for dedicated packet relay infrastructure nodes
- Room Server - for store-and-forward message hub nodes
- Sensor - for telemetry/environmental monitoring nodes
- Select the firmware version (latest stable is selected by default).
- Click Connect. A browser dialog will appear listing available serial ports - select your device.
- Click Flash. The flasher will download the firmware and write it to the device. This typically takes 30-90 seconds.
- The board will reboot automatically after flashing.
- First-boot setup: connect via BLE using the MeshCore app to configure the node name and radio parameters (frequency, spreading factor, bandwidth, coding rate).
Method 2: UF2 Drag-and-Drop (nRF52840 boards only)
Boards based on the nRF52840 MCU (RAK4631, T114, Heltec HT-n62) support UF2 flashing without needing a browser or WebSerial.
- Download the correct .uf2 file for your board and firmware variant from the MeshCore firmware releases page on GitHub.
- Put the board into bootloader mode: double-tap the reset button rapidly. The board will appear as a USB mass storage drive whose name depends on the board's bootloader (for example, a RAK4631 mounts under its own board-specific label, while a nice!nano mounts as
NICENANO) - the exact label varies by board, so look for any newly-appeared USB drive. - Copy the .uf2 file onto the USB drive. The board will automatically flash and reboot.
Platform-Specific Setup Notes
Windows
Many LoRa development boards use USB-to-serial bridge chips (CP2102, CH340, FTDI). If the board is not recognized, you may need to install the driver for your specific USB chip. Check Device Manager for unknown devices. Common driver sources:
- CP2102/CP2104: Silicon Labs VCP driver
- CH340/CH341: WCH driver
- FTDI: FTDI Virtual COM Port driver
Linux
Most USB-serial chips work out of the box on modern Linux. If you get permission errors with WebSerial or serial tools, add your user to the dialout group: sudo usermod -a -G dialout $USER and log out/in.
macOS
macOS 11+ includes a built-in CP210x (CP2102) driver. CH340/CH341 support varies by macOS version (it is absent or unreliable on several releases); if a CH340-based device is not recognized, install the WCH CH34x macOS driver. If the device doesn't appear, check System Information > USB.
Keeping MeshCore Firmware Updated
Keeping your MeshCore nodes on current firmware is important for stability, interoperability, and security. This page covers why updates matter, how to check your current version, update strategies for deployed infrastructure, and how to handle rollbacks.
Why Updates Matter
Bug Fixes
MeshCore is actively developed software. Each release typically resolves routing edge cases, BLE connectivity issues, memory leaks, and hardware-specific quirks. Running old firmware means running known bugs that may have already been fixed.
Performance Improvements
Routing algorithm refinements, radio parameter tuning, and message handling optimizations are regularly incorporated. A network of nodes all running the same recent firmware will generally route more efficiently than one running a mixture of old builds.
New Features
New capabilities - new sensor types, new room server features, new CLI commands, new position reporting formats - are only available in the firmware version that introduced them. Staying reasonably current ensures you can use new functionality as it becomes available.
Security Patches
While MeshCore is a mesh radio protocol rather than an internet-facing service, vulnerabilities can still exist. Malformed packet handling bugs, cryptographic implementation issues, and BLE pairing weaknesses are all possible attack surfaces. Security-relevant fixes are tagged in release notes; apply them promptly.
Version Compatibility
MeshCore nodes on significantly different firmware versions may have interoperability limitations. Keeping your infrastructure nodes current minimizes the risk of incompatibility with nodes running newer client firmware.
Checking Your Current Firmware Version
There are two ways to check the firmware version on a node:
Via the MeshCore App
Connect to the node via the MeshCore app. Navigate to the node's detail or settings view. The firmware version is displayed in the device information section.
Via the MeshCore CLI
Connect to your node using a BLE serial terminal or the MeshCore CLI tool and run:
verThis prints the node's firmware version. MeshCore firmware is currently in the 1.x series, so the output is an illustrative line such as:
v1.15.0The ver command reports the firmware version. To see the hardware/board name, use the separate board command. For runtime health (battery, uptime, queue) use stats-core.
Update Strategy for Infrastructure Nodes
Repeaters and room servers are infrastructure - other users depend on them. Updating carelessly can cause network disruption. Follow this strategy:
1. Test on a Non-Critical Node First
If you operate multiple nodes, update one non-critical node (a spare, or the lowest-traffic repeater) to the new firmware first. Run it for 24 - 48 hours and verify:
- The node comes back online and connects to the mesh after the update.
- Routing works correctly through the node.
- No unexpected reboots or radio lockups occur.
- BLE connectivity from the app functions normally.
2. Preserve Configuration Before Updating
Before updating any node, record its current configuration:
- Node name
- Frequency preset and any custom radio parameters
- TX power setting
- Any custom channel configurations (for room servers: room name, password)
Use the CLI get queries (for example get radio, get tx) and infos to read back the current settings, and screenshot or copy the output. While configuration is generally preserved across firmware updates (stored in non-volatile flash separate from the firmware), a failed or interrupted flash can result in settings being wiped.
3. Update During Low-Traffic Periods
Infrastructure nodes go offline during flashing (typically 30 - 90 seconds). Schedule updates during periods when the network is least used to minimize impact on other users.
4. Update Infrastructure Before Clients
When a new major or minor version is released, update repeaters and room servers before client nodes. Infrastructure nodes carry traffic for all clients; having them on newer firmware ensures they can handle any new packet formats clients may start using.
How to Update
How you update depends on the board. ESP32 boards typically require USB flashing (the same process as initial flashing). nRF52 boards (RAK4631, T114, Seeed XIAO nRF52) additionally support over-the-air updates via the DFU app and the start ota CLI command, which avoids needing a USB connection. The USB web-flasher steps are:
- Connect the node to a computer via USB.
- Open the MeshCore Web Flasher at flasher.meshcore.io in Chrome or Edge.
- Select your board type and firmware variant.
- Select the new firmware version.
- Click Connect, select the serial port, then click Flash.
- Wait for the flash to complete and the board to reboot.
- Verify the node is operational using
ver(firmware version) andstats-core(battery/uptime/queue health).
For nRF52840 boards (RAK4631, T114, HT-n62): UF2 drag-and-drop is available as an alternative. Download the new .uf2 file, enter bootloader mode (double-tap reset), and copy the file to the USB drive.
Rollback: Returning to a Previous Version
If a firmware update causes problems, you can return to any previous version:
- Open the MeshCore Web Flasher.
- Select your board and variant.
- Use the version selector to choose the previous known-good version (older versions are retained in the flasher's version history).
- Flash as normal.
For UF2 boards: download the previous version's .uf2 file from the MeshCore GitHub releases page and flash it via drag-and-drop.
Note: Configuration is generally preserved across rollbacks. However, if a newer firmware version introduced a new configuration key that older firmware does not understand, the old firmware may ignore or reset that setting.
Coordinating Community Network Updates
If you operate nodes on a shared community network, coordinate updates with other network operators:
- Announce planned updates in your community's Discord, forum, or group chat before updating shared infrastructure.
- Share the release notes link so other operators can review what has changed.
- If a major version update is involved, agree on a migration window so all infrastructure nodes are updated together, minimizing the period of mixed-version operation.
- After updating, post a confirmation in the coordination channel so others know the node is back online and on the new version.
Same Version Compatibility Notes
Within the same major version, MeshCore nodes running different minor versions can generally communicate. However:
- As expected behavior for a forwarding mesh, a node running a minor version that introduced a new packet type may generate packets that older minor-version nodes do not fully process - they will typically still forward them but may not display them correctly. Check the release notes for any such changes.
- Patch releases within the same minor version are intended to be bug-fix-only and are generally interoperable, but MeshCore does not publish a formal compatibility guarantee - test before relying on mixed-version meshes.
- When in doubt, check the release notes for any compatibility warnings. The MeshCore team typically calls out cross-version compatibility issues explicitly.
Flashing MeshCore Firmware OTA: The Definitive Guide
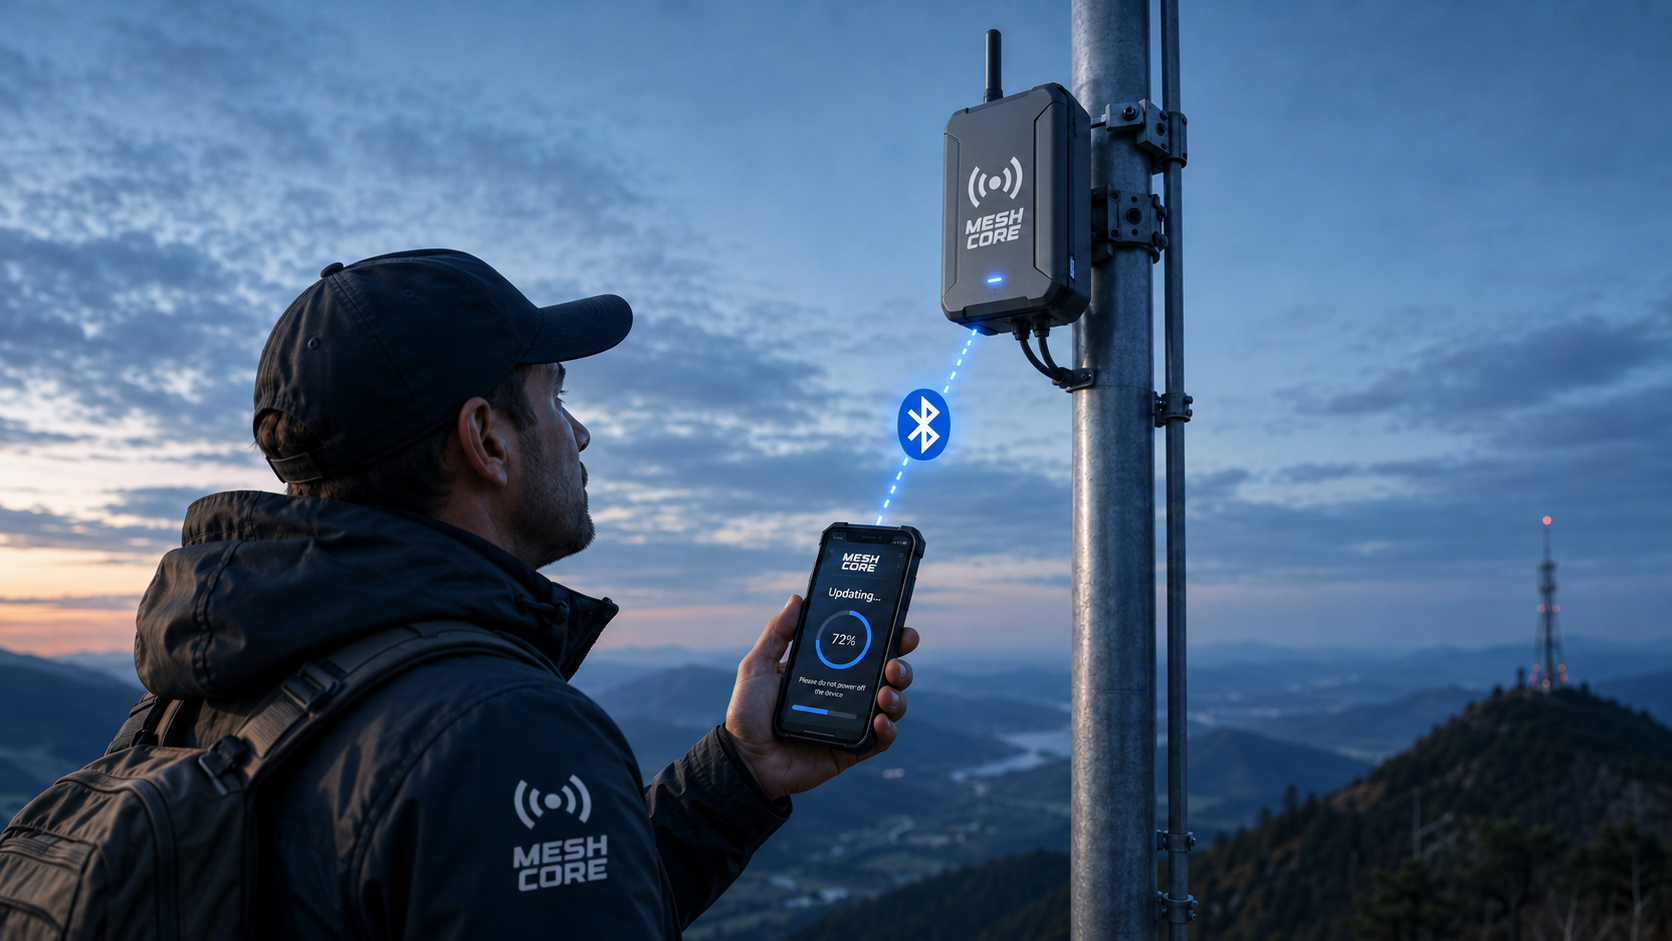
Step-by-Step: OTA Update
Over-the-air (OTA) updating lets you reflash a deployed MeshCore node; a repeater, room server, or companion, without connecting it to a computer over USB. The method depends on the board's chip family: nRF52 boards update over Bluetooth using Nordic's DFU app, while ESP32 boards update over a temporary Wi-Fi access point in your browser. Both are covered below, followed by notes specific to companions.
OTA is convenient for nodes that are hard to reach physically (a repeater on a roof or tower). If a node is within easy reach, a USB flash from flasher.meshcore.io is faster and more reliable than OTA. Reserve OTA for when getting a cable to the device is impractical.
nRF52 Boards
nRF52 boards (RAK4631, Heltec Mesh Node T114, Seeed XIAO nRF52840, and similar) update over Bluetooth LE using Nordic's DFU app. The same process works for repeater, room server, and companion firmware, only the firmware image differs (see the Companions section for the companion firmware-version requirement).
Browser Requirements
The WebSerial API is only available in Chromium-based browsers (the WebSerial API shipped in Chrome/Edge 89 - see MDN/Can I Use):
- Google Chrome (version 89 or later) - recommended
- Microsoft Edge (version 89 or later) - supported
- Firefox, Safari - NOT supported. WebSerial is not implemented in these browsers.
Mobile App Requirements
Download the nRF Device Firmware Update app (you can find it by searching nrf dfu in your app store).
Note: After installation, this app is listed as "DFU" in the apps list, NOT nRF Device Firmware Update.
- Android: https://play.google.com/store/apps/details?id=no.nordicsemi.android.dfu&hl=en-US
- iOS: https://apps.apple.com/us/app/nrf-device-firmware-update/id1624454660
Get the OTAFIX Bootloader
The OTAFIX bootloader (by oltaco: Huw "Taco" Duddy, a MeshCore firmware developer) replaces the stock nRF52 bootloader and makes Bluetooth OTA DFU far more reliable: significantly faster OTA, automatic fallback to OTA DFU mode if an update fails, and the ability to enter OTA DFU mode by holding a button while resetting. It is strongly recommended before doing OTA on nRF52 boards. You install it once, over USB.
- Visit flasher.meshcore.io
- Find your device and select the repeater firmware you run
- Look for the following message:
- We strongly recommend installing OTAFIX Bootloader by @oltaco for more reliable Bluetooth OTA DFU.

- Click the OTAFIX bootloader link to download the bootloader (the file is named something like
update-xxxx.uf2) - Place the device into DFU mode (on most nRF52 boards, double-press the RESET button, twice within about half a second). On the Seeed XIAO nRF52840, press RESET once first; if no drive appears, double-press quickly. The T1000-E and ThinkNode M3 use a magnetic-cable button sequence: see the device's own instructions.
- Verify the device shows up as a drive on your computer
- Windows: In Windows Explorer, look for a new device, such as HT-n5262 (G:)
- macOS: a new removable volume mounts on the desktop, named after the board (e.g. T114 or RAK4631)
- Drag and drop the downloaded bootloader file onto the new device
- The device will reboot and you can now flash the device OTA

Download firmware images to your mobile device
On flasher.meshcore.io, download the firmware image for the device you want to flash. For OTA with the DFU app, choose the DFU package (.zip) variant of the firmware (not the .uf2, which is for USB drag-and-drop).
Flash the Device OTA!
- Open the DFU/nRF Device Firmware Update app on your mobile device
- Find the device you want to flash in the list, tap it
- Select the firmware (the
.zippackage) for the device you want to flash - Ensure the correct device is selected
- Tap Start
Progress is slow. Ensure you have an unobstructed path to the device. External Bluetooth antennas help tremendously.
ESP32 Boards
ESP32 boards (Heltec V3, LilyGo T-Beam and T-Deck, Station G2, RAK11200, and similar) do not use the DFU app or Bluetooth for OTA. Instead, the device hosts a temporary Wi-Fi access point and you upload the firmware to it from a browser. You start this mode with a command, so you need admin access to the node in the MeshCore app.
Requirements
- The node must already be running a MeshCore firmware version that supports OTA. If it is on older firmware, do one USB flash from flasher.meshcore.io first, then future updates can be done OTA.
- A phone or laptop with Wi-Fi and a web browser.
- Admin access to the node in the MeshCore app (you issue the OTA command from its Command Line).
Get the firmware image
- Go to flasher.meshcore.io, select your device and the firmware you run.
- Download the non-merged
.binfile. Do not use the merged.bin: the merged image is only for first-time USB flashing and will not work for OTA.
Start OTA mode on the device
- In the MeshCore app, log into the node and open its Command Line.
- Send the command
start ota. - The device replies with an address such as
Started: http://192.168.4.1/updateand creates a Wi-Fi access point named MeshCore-OTA (depending on firmware it may appear as "MeshCore OTA").
Upload the firmware
- On your phone or laptop, connect to the MeshCore-OTA Wi-Fi network.
- Open http://192.168.4.1/update in a browser.
- Choose the non-merged
.binyou downloaded and start the upload. A progress bar tracks the flash. - When it finishes, the device reboots onto the new firmware and the MeshCore-OTA network disappears. Reconnect your phone/laptop to your normal Wi-Fi.
While in OTA mode the device's only job is hosting this upload page, so it is briefly off the mesh. Keep your phone or laptop close to the node for a stable Wi-Fi link.
Companions
A companion is the node you pair with the MeshCore phone app. Companion firmware updates OTA using the same mechanism as repeaters and room servers. The difference is the firmware image you flash and, on nRF52, a minimum firmware version.
- nRF52 companions (RAK4631, Heltec T114, XIAO nRF52840): update over Bluetooth with the nRF Device Firmware Update (DFU) app, exactly as in the nRF52 Boards section above. The node must already be running companion firmware v1.15 or later to update over OTA. If it is older, flash it once over USB from flasher.meshcore.io to reach v1.15+, after which future updates can be done OTA.
- ESP32 companions (Heltec V3, T-Deck, etc.): update over Wi-Fi using the
start otamethod in the ESP32 Boards section above.
The actual firmware transfer happens in Nordic's DFU app (nRF52) or on the Wi-Fi upload page (ESP32). There is no separate "update firmware" button inside the MeshCore app itself. As always, if the companion is in your hand, a USB flash is the simplest path.